How to Baby-Proof Your Home: A Room-by-Room Safety Checklist

This post may contain affiliate links. Read our policy.
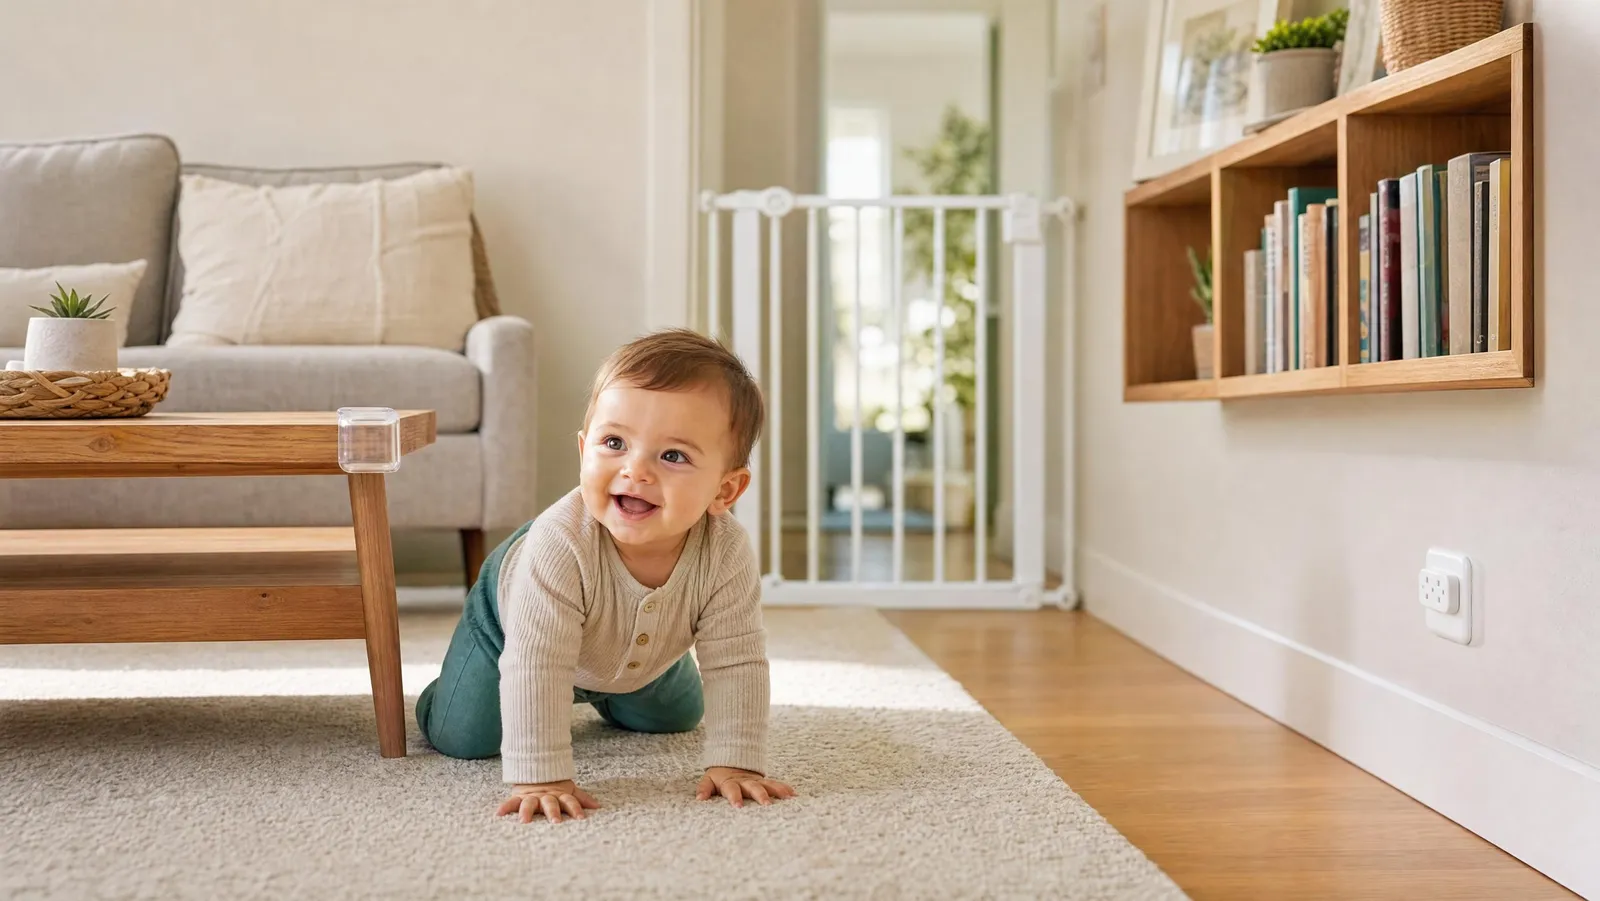
How do you baby-proof your home? You work through it room by room, removing or blocking the hazards a newly mobile baby can reach: covering outlets, locking cabinets, anchoring furniture so it cannot tip, gating the stairs, and getting cords out of little hands. You start before your baby is crawling, and you fix the highest-risk things first. Some of the links in this guide are affiliate links, and we may earn a small commission, at no extra cost to you, if you buy through them.
Here is what pushed me to take it seriously. The first time I got down on my hands and knees to see the living room the way my daughter did, I found four hazards in about ninety seconds, in a room I'd have sworn was safe: a wobbly floor lamp, a low outlet, a dangling blind cord, and the sharp stone corner of the hearth. That crawl-height view is the whole game. Your baby will find the one thing you overlooked, usually the day after they learn to move.
So below is the calm, room-by-room baby proofing checklist I wish someone had handed me: what actually matters, roughly in the order I'd tackle it, and the small handful of gear that does the real work. No fear-mongering, just the practical stuff that keeps a curious little human in one piece. Think of it as a baby proofing room by room walk-through you can knock out over a few relaxed evenings instead of one frantic weekend.
Know When to Start
Start before your baby can move, not after. The rule of thumb I give every new-parent friend is to have the basics installed by the time your baby is sitting up steadily, somewhere around four to six months, because crawling has a way of arriving overnight. According to the American Academy of Pediatrics, babies between six and twelve months will suddenly be able to roll over, crawl, sit, and stand, and many will climb before they walk. The AAP also makes a point that has stuck with me for years: most injuries at this age happen simply because parents are not yet aware of what their child can suddenly do.
The single best thing you can do costs nothing. Get down on the floor in each room and look around at your baby's eye level. Dangling cords, wobbly furniture, tiny objects under the couch, and outlets you never noticed all jump out from down there.
I like to tackle it in waves rather than one exhausting weekend: high-risk items first (tip-overs, stairs, cords, poisons), then the medium stuff (outlets, latches, corners), then the fine-tuning as your baby reveals new tricks. There is no prize for finishing in a single day, and rushing it usually just means frazzled skipping and a task you never quite complete. If you want the full timeline of when to start baby-proofing, room by room and month by month, that is worth mapping out before the crawling begins.
Cover Electrical Outlets
A standard wall outlet sits at exactly crawling height, and a baby's instinct is to poke and probe. Blocking every unused socket your child can reach is one of the fastest wins on the whole list. The Consumer Product Safety Commission lists outlet protection among its core childproofing devices, with one important caveat: pick covers that are large enough that a child cannot choke on them and difficult for a small child to pull out.
That caveat matters, so let me be straight about the trade-off. Cheap plug-in outlet covers are perfect for the sockets you almost never use, and a big value pack lets you seal off a whole house at once. But because the little plugs can be removed, an older, determined toddler can sometimes work one loose, and once out it is small enough to be a choking hazard. For an outlet you plug into every single day, I prefer a self-closing sliding wall plate, which snaps shut automatically when the cord comes out and leaves no loose piece to swallow.
My honest system: plug covers on the many outlets we rarely touch, and a couple of sliding plates on the ones in constant use behind the couch and by the changing table. It is not either-or. It is matching the device to how often you actually use the socket.
Lock Down Cabinets and Drawers
Under most kitchen and bathroom sinks sits a genuinely dangerous cabinet: cleaning sprays, dishwasher pods, drain cleaner, and more. This is the section I'd never skip. According to the AAP's home-safety guidance, you should put safety locks on all cabinets containing cleaning fluids or other dangerous items, and keep all medications, including the ones in your bag or purse, up and out of reach.
The gold standard is to move the truly hazardous stuff, cleaners and medicines, up high where a child simply cannot get to it, and then latch the low cabinets as a backstop. Belt and suspenders. The AAP's separate poison-proofing advice is to store harmful products out of reach, out of sight, and ideally inside a cabinet with a lock or safety latch. I keep the national Poison Help number, 1-800-222-1222, saved in my phone and stuck to the fridge, just in case.
For everything else, a set of cabinet and drawer locks turns off-limits drawers into a mild annoyance for your baby instead of a treasure hunt. Magnetic locks stay hidden inside the door, adhesive latches install without a drill, and simple sliding locks work on double-door cabinets with two knobs. You do not need to lock literally everything; leaving one safe low drawer full of plastic bowls gives a curious baby a place to say yes.
Anchor Furniture and TVs to Stop Tip-Overs
If you do only one thing on this entire page, do this one. A dresser, bookcase, or TV that tips over onto a small child is one of the most serious hazards in any home, and it is completely preventable. According to the Consumer Federation of America, citing CPSC data, tip-overs of furniture, TVs, and appliances kill a child roughly once every two weeks in the United States and send several children to the emergency room every single day.
Congress took this seriously enough to act. The STURDY Act, signed into law in December 2022, directed the CPSC to put a mandatory stability standard behind clothing storage units, and in 2023 the CPSC voted to adopt the ASTM F2057-23 standard as an enforceable rule for dressers and chests 27 inches and taller. Newer furniture is being built more tip-resistant, but that does not help the pieces already in your house, which is where you come in.
The reassuring part is how quick and cheap the fix is. A pack of anti-tip straps costs a few dollars, and anchoring a dresser takes about ten minutes with a drill and a stud finder. I make it a rule to strap every piece a toddler could conceivably use as a staircase, because the danger is not just the furniture tipping on its own, it is a child pulling out the drawers and climbing them like rungs until the whole thing comes over.
Here is what I do in every room:
- Strap tall furniture to the wall. Use anti-tip furniture anchors that screw into a wall stud on one end and into the solid frame of the dresser or bookcase on the other. The AAP simply says to secure heavy furniture like bookshelves and dressers to the wall.
- Mount or strap the TV. Wall-mount flat screens where you can, or strap the TV to the stand it sits on. Never balance a heavy older TV on a dresser.
- Load drawers bottom-heavy. Put the heaviest things in the lowest drawers so the whole piece is harder to tip.
- Remove the bait. Do not set the remote, a phone, or a favorite toy on top of tall furniture, or you have just invited a climb.
Soften Sharp Corners and Edges
Once your baby is cruising along the furniture and taking those first wobbly steps, the sharp corner of a coffee table sits at exactly forehead height. This is the section that saves you a lot of small tears and the occasional scary goose egg. The AAP's home-safety checklist recommends using corner guards on sharp furniture edges, and its 6-to-12-month guidance goes a step further, suggesting you remove sharp-edged or hard furniture from the room where your child mostly plays.
You do not have to redecorate. Start with the worst offenders at toddler height: the coffee table, the hearth or fireplace ledge, low window sills, the corners of a TV stand, and any glass or stone-topped table. Soft, cushioned corner and edge guards take the point off a fall without turning your living room into a padded cell. Clear guards, like the CalMyotis set, are nice because they do the job without being the first thing a visitor notices.
While you are down there, scan for anything a baby could pull down on themselves: a heavy tablecloth they could yank, a lamp with a tempting cord, or a decorative object perched on a low shelf. Corners are the obvious hazard, but the wobbly, top-heavy, and pullable things nearby are worth a second look too.
One honest caveat: adhesive corner guards are not indestructible, and a persistent toddler will eventually peel a few off, sometimes just to chew on them. Press them on clean, dry surfaces so they hold as long as possible, do a quick weekly check that they are all still in place, and treat them as one soft layer of protection rather than a guarantee. The real safety win in a play area is still fewer sharp surfaces at head height in the first place.
Gate Off Stairs and Doorways
Stairs are a top cause of falls for babies who have just figured out how to move, and a good gate is the fix. The AAP recommends using gates at both the top and the bottom of every staircase once your baby is on the go, plus gates to block off rooms you cannot fully baby-proof.
The one rule that matters most here, the one I wish someone had spelled out for me, is about which kind of gate goes where. A pressure-mounted gate must never be used at the top of stairs. Pressure gates hold themselves up with tension against the walls, so a child who leans or runs into one can knock it loose and fall. The top of a staircase needs a hardware-mounted gate that screws into the wall studs or door frame. Pressure-mounted gates are perfectly safe for doorways, between rooms, and at the bottom of the stairs, where a slightly looser fit cannot cause a fall.
- Top of stairs: hardware-mounted only, no exceptions.
- Bottom of stairs: pressure-mounted is fine.
- Doorways and between rooms: pressure-mounted is fine and usually the easiest, no-drill choice.
Look for a gate that meets the ASTM F1004 standard, and skip any old accordion-style gate with V-shaped or diamond openings, which the CPSC has warned about for decades as a head-entrapment risk. There is more to choosing the right baby gate than fits in one section here, so it is worth reading up before you buy for that critical top-of-stairs spot.
Baby-Proof Stairs and Banisters
Gates handle the top and bottom of a staircase, but the run in between has its own hazards. The vertical rails of a banister can be spaced widely enough for a baby to slip a head, arm, or leg through, and the horizontal ones practically beg to be climbed like a ladder.
If the gaps between your balusters are wider than about four inches, cover the railing with a taut, transparent banister guard or a roll of clear plastic sheeting fastened securely along the length. It keeps small limbs and heads on the safe side while you can still see through it. For open horizontal railings, the same guard removes the ladder effect.
A few more habits I keep for stairs and banisters: mount the stair gates so the bottom rail sits flush with the step, with no gap a foot or toy can wedge under; add a non-slip runner or treads if your stairs are hardwood; and keep the whole staircase clear of the toys, laundry baskets, and shoes that pile up on steps. Once a child can reliably climb over a gate, usually around age two, it is time to retire that gate rather than keep trusting it.
Secure Doors and Doorways
Doors are sneaky. They pinch fingers, they slam, and they open onto exactly the rooms you would rather keep off-limits, the garage, the home office, the bathroom with its water and cleaners and toilet.
The workhorses here are door knob covers and locks. A knob cover is a loose plastic shell that spins freely, so an adult can squeeze and turn it while a small child cannot get a grip, which is a simple way to keep a bathroom or a stairwell door shut. For bathrooms especially, this matters, because standing water in a tub or an unlatched toilet is a drowning risk for a top-heavy toddler. I also add a foam or U-shaped pinch guard high on the door edge so a heavy door cannot slam shut on little fingers, and a hook-and-eye latch mounted up high on the doors to genuinely dangerous rooms.
Do not forget the front and back doors. As your child gets taller and more capable, a high deadbolt or a chain latch out of their reach keeps a determined escape artist from letting themselves outside while you are distracted. If a door opens onto a pool, a driveway, or a busy street, that extra high lock is not overkill, it is one of the most important devices in the house.
One more small mercy for everyday life: door stops and door hinge guards. The soft foam wedge that keeps a door from clicking shut also keeps it from pinching fingers, and a hinge-side guard covers the gap on the back edge of the door where little fingers love to explore. They are cheap, they take seconds to install, and they head off one of the most common household ouches.
Tame Cords and Window-Blind Cords
This is the quiet hazard most people underestimate, and it is deadly serious, so I want to be plain about it without scaring you. The looped cord on a set of window blinds is a strangulation risk for a curious child. According to the CPSC, corded window coverings were involved in at least 440 child deaths between 1973 and 2022, and on average about nine children under five still die each year from strangling in the cords of blinds, shades, and draperies.
The safest fix is the simplest: go cordless. In 2022 the CPSC voted to strengthen its federal safety standard for operating cords on window coverings, part of a long push toward cordless products. Where you cannot replace a blind right away, wrap and secure the cord high on a cleat well out of reach, move the crib and any climbable furniture away from windows entirely, and never place a bed or changing table where a child could reach a cord.
The same "get it out of reach" logic applies to every other cord in the house, so treat cords and blind cords as one project. Bundle and tuck away the cords behind the TV and lamps, use cord shorteners or covers, and keep charging cables and monitor cords out of the crib. The AAP also recommends installing operable window guards on any window above the first floor, so an open window for fresh air never becomes a fall.
Baby-Proof the Kitchen
The kitchen is where the family lives, which means your baby wants to be underfoot there more than anywhere, right next to the hot surfaces, sharp tools, and cleaning chemicals. It earns its own careful pass.
Work through it in zones:
- The stove. Turn pot handles toward the back, cook on the rear burners when you can, and add stove-knob covers so a toddler cannot switch on a burner. A stove guard across the front edge helps keep hands off a hot cooktop.
- Low cabinets and the trash. Latch the cabinets, and lock or gate the trash can, which is full of things a baby should never mouth.
- Chemicals up high. Move dishwasher pods and cleaning sprays out of the under-sink cabinet to a high, latched spot. The colorful pods are especially tempting and especially dangerous.
- Appliances and cords. Keep the toaster, kettle, and slow-cooker cords pushed back so they cannot be yanked, and latch the oven and the dishwasher, whose door drops down into a step stool and whose detergent is caustic.
- Small parts and food. Keep magnets, coins, and small hard foods off low surfaces, since these are classic choking hazards.
A trick that saved my sanity: give your baby a job. A low drawer stocked with plastic bowls, wooden spoons, and lids becomes their drawer, a safe place to bang and empty while you cook, which keeps small hands busy and away from the oven. Set up the high chair and any feeding zone away from the stove and off the traffic path, and get in the habit of keeping hot mugs and pans well back from the counter's edge, since a curious reach can pull a scalding drink straight down.
There is genuinely a lot more to how you baby-proof your kitchen than fits in one checklist, from where you feed your baby to how you handle hot drinks, so it is a room worth a deeper walk-through of its own.
Start With an All-in-One Kit
If this list feels like a lot, here is the shortcut I actually recommend to overwhelmed friends: one of the big all-in-one baby-proofing kits covers the basics in a single afternoon, and then you fill the specific gaps afterward. A multi-room set that packs in a stack of cabinet and drawer latches, a few slide locks, and a handful of door knob covers, like the 80-piece Safety 1st set, gets your whole first floor from zero to reasonably safe in one order, for the price of a couple of takeout dinners.
Think of a starter kit as the broad first pass, not the finish line. The high-stakes items, anchoring furniture, gating the stairs, and dealing with blind cords, usually need their own dedicated products, and the kitchen and outlets get their own attention as we covered above. But a kit knocks out a dozen small tasks at once so you are not paralyzed by a shopping list.
Two small pointers before you buy any kit. First, check that the door knob covers it includes actually fit your knobs, since they are made for round knobs and will not work on lever-style handles, which need their own type of guard. Second, resist the urge to install every single piece just because it came in the box; the goal is a home that is safe and still livable, not one where you fumble with a latch every time you reach for a dish towel.
One last habit that has served me for years: baby-proofing is not a one-and-done. The AAP suggests doing a fresh safety walk-through of your home at least every six months, because your child keeps unlocking new abilities, and a room that was safe for a roller is a brand-new adventure for a climber. Get down on the floor, look again, and adjust. You are not trying to build a padded fortress. You are just buying yourself the handful of seconds it takes to turn around, stir the soup, or answer the door and still trust that your little explorer is okay. You've got this.
Explore the full series
- The Best Cabinet and Drawer Locks to Baby-Proof Your Home — Magnetic, adhesive, and U-shaped locks that keep curious toddlers out of cabinets and drawers.
- The Best Anti-Tip Furniture Anchors to Prevent Tip-Overs — Straps and anchors that secure dressers, bookcases, and TVs to the wall.
- How to Keep Your Child Safe With a Baby Gate — Pressure-mounted vs. hardware-mounted gates, and which one belongs at the top of the stairs.
- The Best Outlet Covers and Plug Protectors for Baby-Proofing — Plug caps, sliding plates, and box covers, and why the cheapest option is the weakest one.
- The Best Corner Guards and Edge Protectors for Babies — Foam and clear bumpers that stay stuck, and how to measure before you order.
- The Best All-in-One Baby-Proofing Kits — How to read a kit's piece count, and which kits are worth the money once you do.
- Baby-Proofing Doors: Knob Covers, Locks, and Pinch Guards — Knob covers, pinch guards, and door-top locks, plus the fire-escape trade-off nobody mentions.
- Baby-Proofing Cords: Blind Cords, Wires, and Cable Safety — Why blind cords get a section of their own, and what to do about every other cord in the house.
- How to Baby-Proof Your Kitchen — The room-by-room order to work in: burns first, then poisons, then everything a cruiser can reach.
- Baby-Proofing Stairs and Banisters — The top and the bottom are two different jobs, plus what to do about gaps in a banister.
- When to Start Baby-Proofing (and What to Tackle First) — A stage-by-stage timeline, and the short list worth doing before your baby moves at all.

Safety 1st Home Safeguarding and Childproofing Set (80 Pcs)
An 80-piece kit that tackles a whole house in one box, so you are not placing ten separate orders the week your baby starts moving. It bundles the everyday essentials: 30 cabinet and drawer latches, 4 slide locks sized for double-door cabinets, and 6 Grip 'n Twist door knob covers to keep adult-only rooms off-limits. It is the broad first pass I would reach for to cover the basics across every room at once.
- Brand
- Safety 1st
- Category
- Best Starter Kit
This was the single order that got our whole first floor sorted in one afternoon, latches and knob covers and all.

Safety 1st Electrical Outlet Baby Proof Covers (36 Count)
A 36-count value pack of plug-style covers that push into unused sockets and block curious little fingers. They are removable and reusable, so you can pop one out when you need the socket and slot it back in afterward. With three dozen in the box, one inexpensive purchase covers several rooms.
- Brand
- Safety 1st
- Category
- Best Outlet Covers
We slotted these into every socket the kids could reach, and it is a relief to glance around a room and see nothing they can poke at.

CalMyotis Corner Protectors for Baby (12 Pack, Clear)
Twelve clear guards that cushion the sharp corners of coffee tables, hearths, and low furniture right at toddler head height. The spherical shape helps absorb the shock of a knock, and each guard comes with three pre-cut adhesive pads for a firm hold. The PVC is free of phthalates, BPA, and heavy metals, and the near-invisible finish blends in instead of announcing that a baby lives here.
- Brand
- CalMyotis
- Category
- Best Corner Guards
After my son clipped his head on the coffee table once, these went on every corner in the room, and guests never even notice they are there.
- 01Safety 1stBest Starter KitSafety 1st Home Safeguarding and Childproofing Set (80 Pcs)
- 02Safety 1stBest Outlet CoversSafety 1st Electrical Outlet Baby Proof Covers (36 Count)
- 03CalMyotisBest Corner GuardsCalMyotis Corner Protectors for Baby (12 Pack, Clear)
When should I start baby-proofing?+
What should I baby-proof first?+
Is baby-proofing really necessary?+
Are plug-in outlet covers or sliding outlet plates better?+
How do I anchor furniture so it cannot tip over?+
Can I use a pressure-mounted gate at the top of the stairs?+
Sammie Seelbach
Sammie is a mom of two and the lead reviewer at Smart Baby Reviews. Since becoming a parent she has become obsessed with researching the safest, smartest baby gear on the market — testing thermometers at 2 a.m., wrangling baby gates, and sterilizing more bottles than she can count. She shares what actually works so other parents can make confident, informed decisions for their little ones.